Installation of Pacesetter Short Throw Shifter in 3rd-Gen Maxima
This is the how to for the Pacesetter Short Throw Shifter just incase you guys get one and happen to lose the paper or the paper doesn’t come with it.
Quick Shift Kit Contents
1 – Shifter lever
1 – Delrin pivot ball
2 – Bushings
1- 1/4″ x 1/4″ set screw
1 – Hex wrench
1 – Teflon grease tube
Instructions:
1. Remove shifter knob and center conole from vehicle. Remove rubber boot and floor pan.
2. Raise vehicle using floor jack and support it on a sturdy jack STANDS.
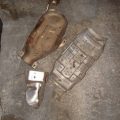
3. Remove the exhaust pipe from the head pipe and the hangers after the catalytic converter. This will allow you to gain access to the heat shield. Remove heat shield.
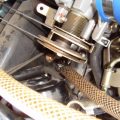
4. The shifter mechanism is now exposed and ready to be removed. Unfasted the control rod from the lever by removing the pivot bolt and lock nut. The control rod will now swing free allowing access to M8 nuts securing the shifter to the support assembly. Remove the M8 nuts securing the support assembly and the detent spring. Tech Tip: If the M8 nuts will not break free, apply pressure on the studs from the top.
5. Push the socket assembly securing the shifter up and set aside. The two bearings and the seat can now be removed. Do no discard these parts, as they will be needed later. Pull the shifterand boot assembly out.
6. Lightly grease the pin side of the bushings in the Quick-Shift lever. Thread the Delrin adjustable ball onto the shift lever and adjust to desired position. (the middle is a good starting point. If you would like the shortest shift however, which i recomend, move it to the highest point on the threads) Tighten set screw to approximately 8 inch pounds of torque, make sure the nylon tip of the set screw is pointed towards the threads. Push the lever into the support assembly and grease the shift ball (A LOT). Replace the bushing halves and secure the rubber seat. Push the socket over the lever and bearing assembly and tighten the M8 nuts onto the studs. Tighten the set screw to approximately 8 inch pounds of torque, make sure the nylon top of the set screw is pointed towards the threads.
7. Bolt the support lever and assemblies back into the chassis. Align the holes in the control and lever rod and install the pivot bolt and lock nut. Torque to 20 ft. lbs. NOTE: If you addjust your Quick-Shift shifter for a very short throw, it will be necessary to cut a hole in the heat shield (or just take a hammer to it).
To cut the hole in the heat shield, measure the distance the shifter travels by shifting it forward and backward and mark the heat shield in it the correct positions. Using a jigsaw cut a hole in the area you have marked, trim area until shifter has 1/2″ clearance all around. (i recommend just denting it in with a hammer. that way you still have your heat shield and it’s quicker.)
8. Replace the rubber boot into the floow pan, and replace the console.
9. Re-install headpipe and exhaust system.
10. Test shifter to ensure you have proper engagement and no interference.
11. Lower vehicle and road test vehicle.
Note: The replacement dust boot is no longer available from pacesetter so remove it with care and try not to damage it at all.
Add on: After using my STS for a while it’s really nice to have the shortened throw but i don’t think i put enough oil in it. It is very, very notchy. So much so I almost can’t get it into gear sometimes. So my point is grease the ball very well. After using the grease on the other needed parts FIRST, Use the rest of it on the ball. That should hopefully help keep the thing loose. Another thing is, it seems to expand when it gets hot from the exhaust which also makes it harder to shift. I think some heat wrapping around the cat might be a good idea. I’ll test it out soon and give my opinions on that.
Also, do not overtighten any of the bolts. This alone can cause difficulty in shifting.
Article by:mtcookson